Build a Tip Jar dApp on Rootstock with Foundry & Dynamic
This tutorial shows you how to build a fully functional tipping dApp on the Rootstock Testnet. You’ll deploy a TipJar smart contract using Foundry and connect it to a frontend built with Dynamic — a wallet connector and identity toolkit.
We’ll use two ready-made starter kits:
-
Rootstock Foundry Starter Kit – A preconfigured Foundry project for writing, testing, and deploying smart contracts on Rootstock. Perfect for developers who want to quickly get started with EVM-compatible contract development on Bitcoin's secure network.
-
Rootstock Dynamic Kit – A feature-rich React/Next.js frontend pre-integrated with Dynamic and wagmi. It supports wallet connection, token transfers, message signing, and smart contract interactions, and is ready to run on the Rootstock Testnet.
By the end, you'll have a complete full-stack dApp where users can send RBTC tips and messages via their Web3 wallet.
Prerequisites
Before you begin, make sure you have the following installed and configured:
- Node.js v18+
- Foundry – used to write, test, and deploy smart contracts
- MetaMask or another EVM-compatible Web3 wallet connected to the Rootstock Testnet
- Some test tRBTC from the Rootstock Faucet
- An Environment ID from your Dynamic dashboard. Follow this quick guide on Setting up Dynamic.
Setup the Rootstock Foundry Starter Kit Repository
Begin by cloning the Rootstock Foundry Starter Kit, which sets up a Foundry-based development environment tailored for the Rootstock network. After cloning, open it in a code editor.
git clone https://github.com/rsksmart/rootstock-foundry-starterkit.git
cd rootstock-foundry-starterkit

Create the TipJar Contract
In this step, you'll create a simple smart contract that allows users to send tips (in RBTC) along with a message. The contract stores the tips and allows only the owner (the deployer) to withdraw the funds.
Navigate to the src/ folder in your project and create a new file called TipJar.sol:
// SPDX-License-Identifier: MIT
pragma solidity ^0.8.0;

contract TipJar {
    address public owner;

    event Tipped(address indexed from, uint256 amount, string message);

    constructor() {
        owner = msg.sender;
    }

    function tip(string calldata message) external payable {
        require(msg.value > 0, "Tip must be greater than 0");
        emit Tipped(msg.sender, msg.value, message);
    }

    function withdraw() external {
        require(msg.sender == owner, "Only owner can withdraw");
        payable(owner).transfer(address(this).balance);
    }

    function getBalance() external view returns (uint256) {
        return address(this).balance;
    }
}
Optional: Add Test File
Navigate to the src/test folder in your project and create a new file called TipJar.t.sol:
// SPDX-License-Identifier: MIT
pragma solidity ^0.8.0;

import "forge-std/Test.sol";
import "../src/TipJar.sol";

contract TipJarTest is Test {
    TipJar public tipJar;

    function setUp() public {
        tipJar = new TipJar();
    }

    function testTip() public {
        tipJar.tip{value: 1 ether}("thanks!");
        assertEq(address(tipJar).balance, 1 ether);
    }
}
Run the test:
forge test
When running the test, the contract is also compiled.
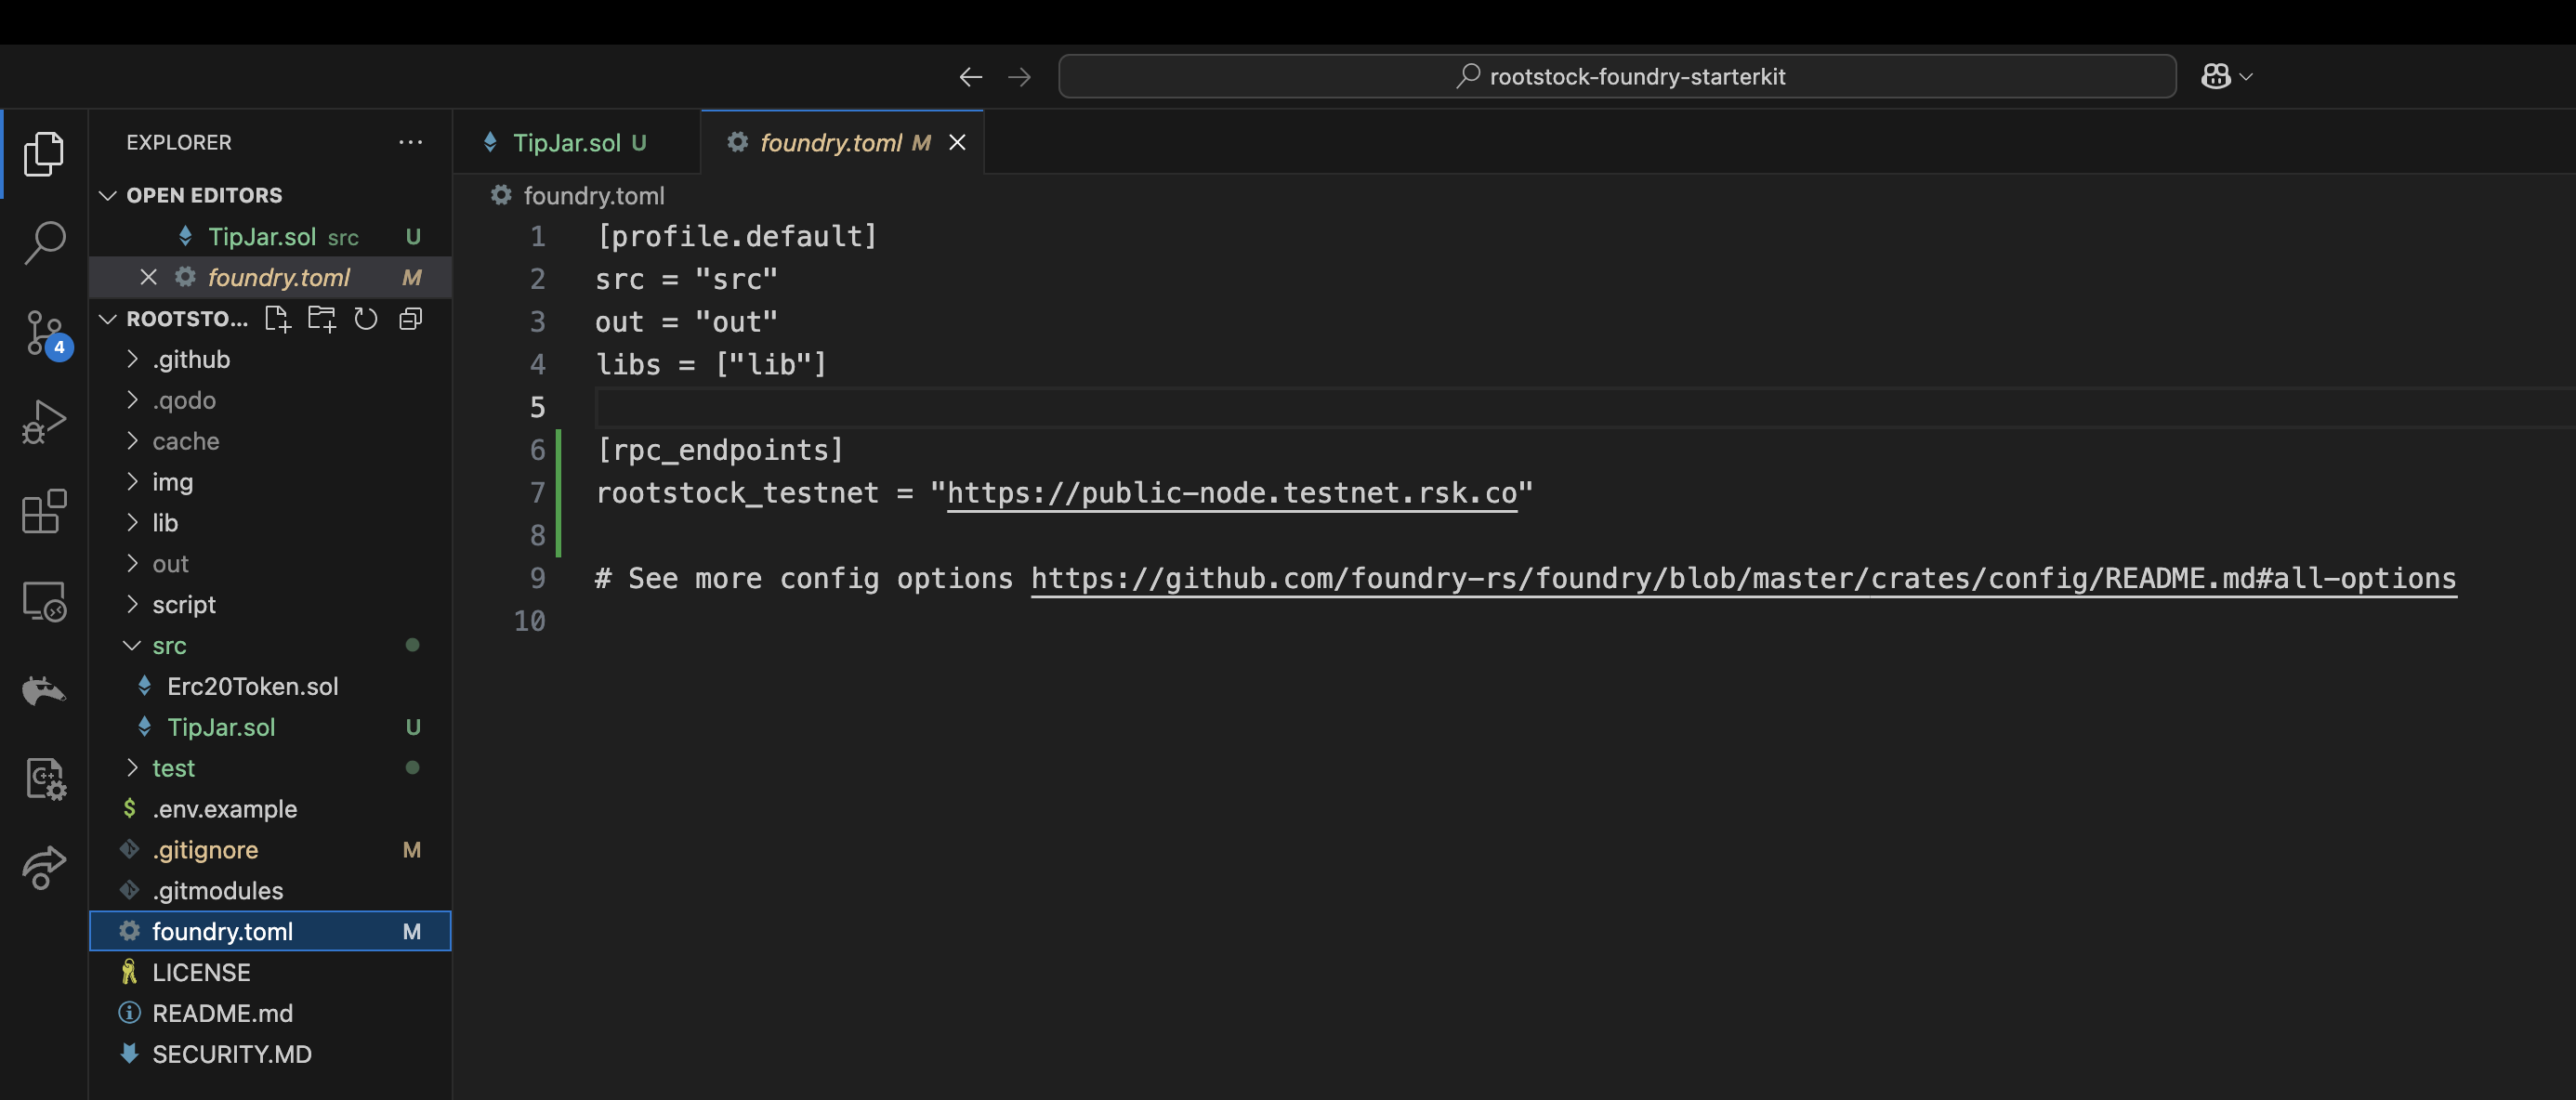
Set the RPC Endpoint in foundry.toml
This sets up rootstock_testnet as a shortcut you can use when deploying or interacting with contracts.
[rpc_endpoints]
rootstock_testnet = "https://public-node.testnet.rsk.co"
Compile and Deploy the Contract
Once your contract is written, you need to compile it to generate the necessary artifacts (like the ABI and bytecode) before deployment.
forge build

Export your private key and ensure the account has tRBTC:
export PRIVATE_KEY=your_private_key_here
Then deploy:
forge create --rpc-url https://public-node.testnet.rsk.co --private-key $PRIVATE_KEY --legacy --broadcast src/TipJar.sol:TipJar

Take note of the deployed contract address. You’ll use it later.
You can verify the contract and track your transactions on the Rootstock Testnet Explorer. Look up the contract address, select Code, and then Verify Contract.

Setup the Rootstock Dynamic Kit
To build the UI for your tipping dApp, you’ll use a prebuilt React template that integrates Dynamic — a developer tool for wallet connection and authentication — and supports interaction with your smart contract from the previous step.
Start by cloning the repository:
git clone https://github.com/RookieCol/rootstock-dynamic.git
cd rootstock-dynamic
yarn install  # or bun install
To connect your frontend to the correct wallet environment and smart contract, you’ll need to set environment variables. Create a .env.local file at the root of the project:
cat > .env.local <<EOF
NEXT_PUBLIC_DYNAMIC_ENVIRONMENT_ID=YOUR_DYNAMIC_ENV_ID
NEXT_PUBLIC_TIPJAR_ADDRESS=YOUR_CONTRACT_ADDRESS
EOF
-
NEXT_PUBLIC_DYNAMIC_ENVIRONMENT_ID: This connects your app to the correct Dynamic environment. You can find it in your Dynamic dashboard.
-
NEXT_PUBLIC_TIPJAR_ADDRESS: This is the deployed address of your
TipJarsmart contract.
Add the ABI to the Dynamic Kit
To interact with your deployed contract from the frontend, you’ll need its ABI (Application Binary Interface). Foundry generated this when you you compiled the contract.
Copy the ABI from your Foundry project:
Copy the ABI file:
-
From:
rootstock-foundry-starterkit/out/TipJar.sol/TipJar.json -
To:
rootstock-dynamic/lib/TipJar.json
(Create this file manually, it doesn’t exist by default.)
Create the TipJar Component and Render It
Now you'll build the UI component that lets users send tips and messages to your smart contract.
Create a new file at components/TipJar.tsx and add the following:
"use client"

import { useState } from "react"
import { useAccount, useSimulateContract, useWriteContract } from "wagmi"
import { parseEther } from "viem"
import { Button } from "@/components/ui/button"
import { Input } from "@/components/ui/input"
import { useToast } from "@/hooks/use-toast"

import tipJarAbi from "@/lib/TipJar.json" assert { type: "json" }

export default function TipJar() {
  const { address } = useAccount()
  const { toast } = useToast()

  const [message, setMessage] = useState("")
  const [amount, setAmount] = useState("0.001")

  const { data: simulation } = useSimulateContract({
    address: process.env.NEXT_PUBLIC_TIPJAR_ADDRESS as `0x${string}`,
    abi: tipJarAbi.abi,
    functionName: "tip",
    args: [message],
    value: parseEther(amount),
  })

  const { writeContractAsync, isPending } = useWriteContract()

  async function handleTip() {
    try {
      if (!simulation) throw new Error("Simulation failed")

      const txHash = await writeContractAsync(simulation.request)

      toast({
        title: "Transaction sent!",
        description: `Hash: ${txHash}`,
      })
    } catch (err) {
      toast({
        title: "Error",
        description: (err as Error)?.message ?? "Something went wrong",
      })
    }
  }

  return (
    <div className="max-w-sm space-y-4">
      <h2 className="text-xl font-semibold">Leave a Tip</h2>
      <Input
        type="text"
        placeholder="Leave a message"
        value={message}
        onChange={(e) => setMessage(e.target.value)}
      />
      <Input
        type="number"
        placeholder="Amount in RBTC"
        value={amount}
        onChange={(e) => setAmount(e.target.value)}
      />
      <Button disabled={isPending} onClick={handleTip}>
        {isPending ? "Tipping..." : "Send Tip"}
      </Button>
    </div>
  )
}
This component lets users connect their wallet, enter a tip and message, and send a transaction to the contract with feedback via toast notifications.
To display your TipJar component, update the homepage layout.
In app/page.tsx, add the following:
import { DynamicWidget } from "@/lib/dynamic";
import TipJar from "@/components/TipJar";

export default function Main() {
  return (
    <main className="min-h-svh flex flex-col justify-center items-center gap-6 p-6">
      <h1 className="text-4xl font-bold text-center">
        Send a Tip on <span className="text-blue-600">Rootstock</span>
      </h1>
      <DynamicWidget variant="modal" />
      <TipJar />
    </main>
  );
}
This renders a headline, shows the wallet connect modal, and displays the TipJar UI for sending tips.
Run the App and Send a Tip
Start the frontend development server:
yarn dev
Open your browser at http://localhost:3000.
Connect your wallet using the Dynamic modal, enter a tip amount and an optional message, then click Send Tip.
This sends a transaction to the tip() function on your deployed smart contract, transferring RBTC and (if provided) logging the message on-chain.
If the transaction is successful, you’ll get a toast notification with the transaction hash.
If it fails, an error toast will appear with more details.
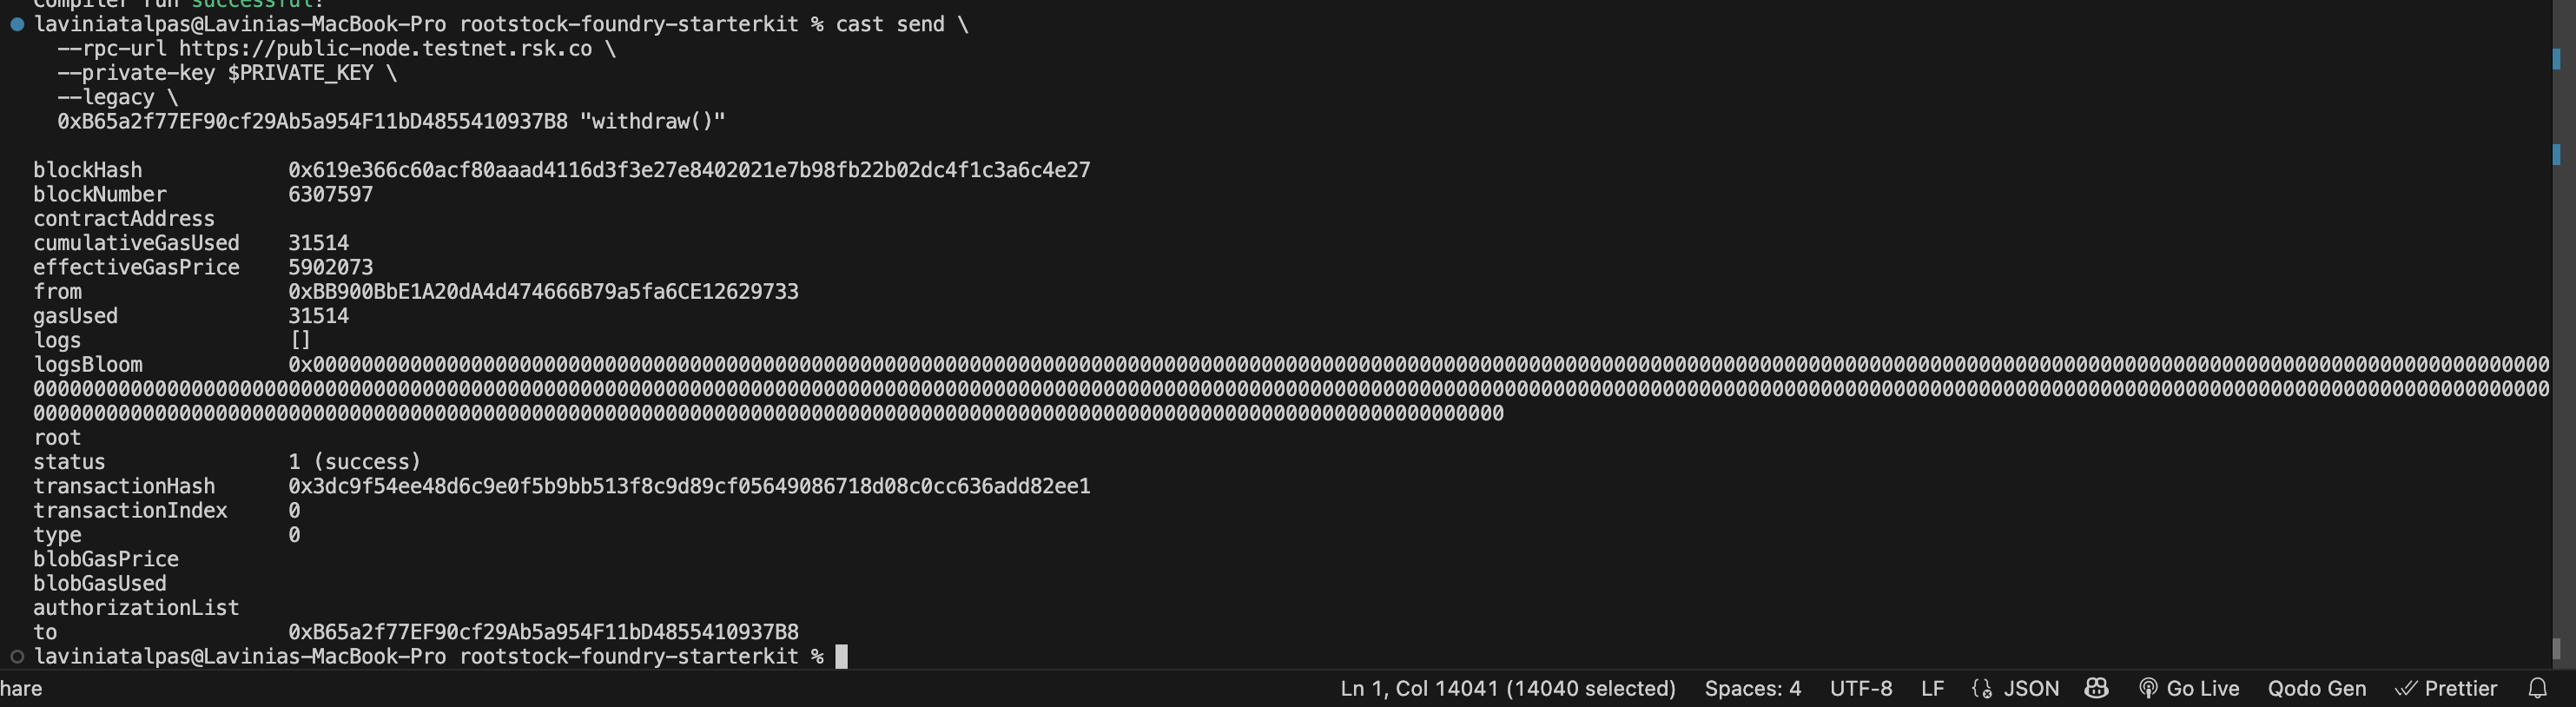
Withdraw Funds from the Contract
Only the contract owner (the address that deployed the contract) is allowed to withdraw the accumulated tips.
To withdraw using Foundry:
cast send --rpc-url https://public-node.testnet.rsk.co --private-key $PRIVATE_KEY --legacy 0xYOUR_CONTRACT_ADDRESS "withdraw()"
Replace 0xYOUR_CONTRACT_ADDRESS with the deployed contract address . This will transfer the full balance of the contract to your wallet.
Ensure your wallet has tRBTC to cover gas fees when calling withdraw().
Optional: Watch the Video Walkthrough
If you’d rather watch the process step-by-step, check out this 5-minute video guide.
Troubleshooting
-
Simulation failed error in
TipJar.tsx
Make sureNEXT_PUBLIC_TIPJAR_ADDRESSis set correctly in.env.local. -
Contract not deploying
Check that your wallet has tRBTC and that you are using the--legacyflag when deploying with Foundry. -
Withdraw function not working
Only the deployer can callwithdraw(). Make sure you're using the right private key and have tRBTC for gas. -
dApp not connecting to wallet
Confirm MetaMask is on Rootstock Testnet and the contract address is correct in.env.local. -
Contract verification fails on Explorer
Use the exact Solidity version, remove constructor args, and ensure the bytecode matches.
Always validate inputs and handle edge cases in production dApps. Never hardcode sensitive values like private keys.